Migrating mailboxes from Exchange Server to Microsoft 365 is a common step for organizations looking to modernize their email infrastructure, reduce server maintenance, and improve accessibility. Microsoft 365 provides cloud-based email, collaboration, and productivity services, allowing employees to access their mailboxes from anywhere without depending entirely on on-premises infrastructure.
However, the Exchange Migration process can be challenging for administrators unfamiliar with PowerShell, Exchange Management Shell, or migration scripts. Although PowerShell is widely used for mailbox management and migration, administrators can also use graphical tools such as Exchange Admin Center (EAC), Microsoft 365 Admin Center, and third-party migration software to move mailboxes.
Migrating Exchange mailboxes without PowerShell is particularly useful for small businesses, IT teams with limited scripting knowledge, and administrators who prefer a straightforward, interface-based migration process.
This guide explains how to migrate Exchange mailboxes to Microsoft 365 without PowerShell, the available migration methods, the steps involved, and how to avoid common migration problems.
Why Migrate Exchange Mailboxes to Microsoft 365?
Organizations migrate from on-premises Exchange Server to Microsoft 365 for several reasons:
- Reduced infrastructure maintenance: Minimize the need to maintain physical servers, storage, hardware, and infrastructure.
- Anywhere access: Allow employees to access email, calendars, and contacts from different devices and locations.
- Scalability: Add users and manage mailbox resources according to business requirements.
- Improved collaboration: Integrate email with Microsoft Teams, OneDrive, SharePoint, and other Microsoft 365 applications.
- Simplified administration: Manage users, licenses, and cloud mailboxes through centralized administrative portals.
Despite these benefits, Exchange Migration requires proper planning, compatibility checks, and mailbox validation to ensure a smooth transition.
Can You Migrate Exchange Mailboxes Without PowerShell?
Yes, you can migrate Exchange mailboxes to Microsoft 365 without manually running PowerShell commands in supported scenarios. Microsoft provides graphical migration options through the Exchange Admin Center, while third-party migration tools can simplify the process further.
The appropriate method depends on your Exchange Server version, mailbox count, infrastructure, and migration requirements.
Common migration options include:
- Exchange Admin Center (EAC): Manage supported migration batches through a graphical interface.
- Microsoft 365 Admin Center: Prepare user accounts, domains, and licenses.
- IMAP migration: Transfer email messages from supported IMAP sources.
- Third-party migration software: Move mailboxes using a guided interface with additional migration capabilities.
These methods eliminate the need to manually execute PowerShell for many migration tasks, although advanced configurations or troubleshooting may still require scripting in certain environments.
Prerequisites for Exchange Migration
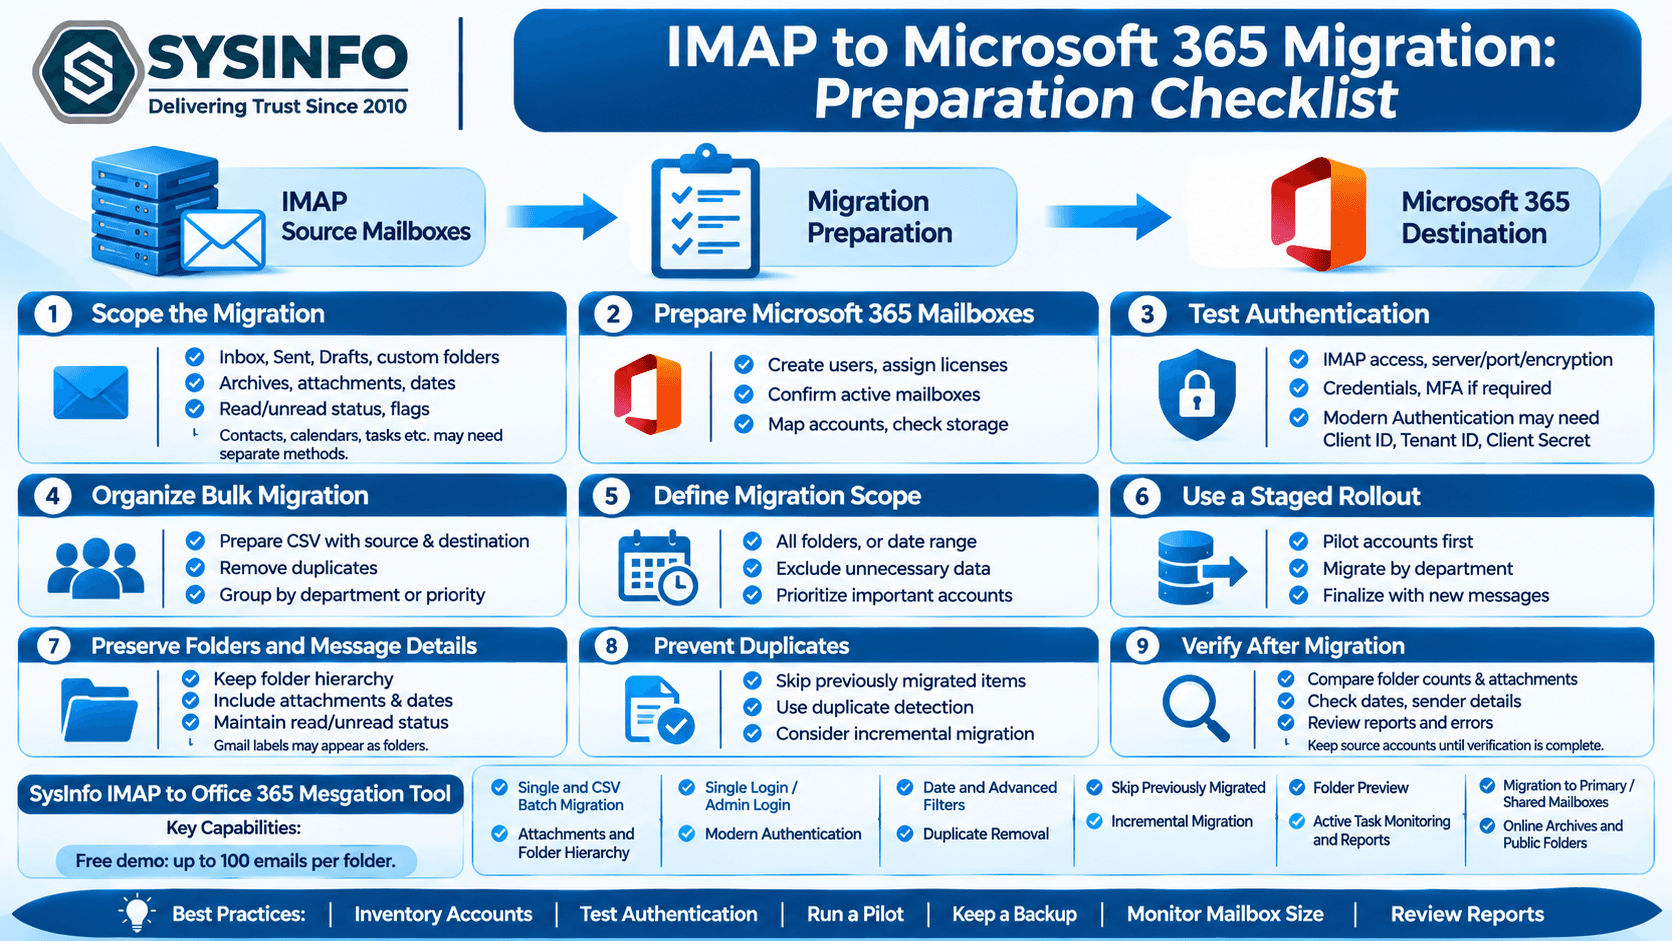
Before starting the migration, prepare the source Exchange environment and Microsoft 365 tenant to avoid connection errors, failed batches, or missing mailbox data.
Make sure you have the following:
- Microsoft 365 subscription: Appropriate licenses for the users being migrated.
- Administrative permissions: Access to manage Exchange mailboxes, Microsoft 365 users, and migration settings.
- Verified domain: Your organization's email domain added and verified in Microsoft 365.
- Mailbox inventory: Details of mailboxes, sizes, archives, and migration requirements.
- Network connectivity: A stable internet connection with sufficient bandwidth.
- Backup: A reliable backup of the source mailboxes before migration.
- Compatibility checks: Confirm Exchange version support, connectivity, and migration prerequisites.
It is also recommended to test the migration with a few mailboxes before moving the entire organization.
Methods to Migrate Exchange Mailboxes Without PowerShell
1. Exchange Admin Center (EAC)
Exchange Admin Center provides a graphical interface for managing mailboxes and migration batches. Administrators can configure migration endpoints, select mailboxes, initiate migrations, and monitor progress without writing PowerShell scripts.
It is a practical option for organizations using supported Exchange Server environments and planning migrations to Exchange Online.
2. Microsoft 365 Admin Center
The Microsoft 365 Admin Center is used to manage cloud users, licenses, domains, and services. Although it is not the primary interface for every mailbox migration, it helps administrators prepare destination accounts, assign licenses, and manage users after migration.
3. IMAP Migration
IMAP migration is suitable for transferring email messages from IMAP-compatible email systems to Microsoft 365. It can be useful when the primary requirement is to migrate email rather than complete Exchange mailbox data.
However, IMAP migration generally does not transfer calendars, contacts, tasks, and other Exchange-specific mailbox items. If you need a complete mailbox migration, consider other supported methods.
4. Third-Party Exchange Migration Software
Third-party migration software can simplify mailbox migration when native methods are unsuitable or difficult to manage. These tools generally provide a graphical workflow for selecting source mailboxes, connecting to Microsoft 365, mapping users, and migrating mailbox data.
Depending on the tool, they may support emails, attachments, calendars, contacts, archives, public folders, and batch migration. They can be especially useful for organizations migrating multiple mailboxes or working with complex migration requirements.
Step-by-Step: Migrate Exchange Mailboxes to Microsoft 365 Using EAC
The Exchange Admin Center is a convenient option for administrators who prefer a graphical migration process. The following steps outline a typical supported migration workflow.
Step 1: Prepare the Microsoft 365 Tenant
First, configure the destination Microsoft 365 environment.
- Sign in to the Microsoft 365 Admin Center.
- Add and verify your organization's domain.
- Create user accounts for employees, if required.
- Assign the appropriate Microsoft 365 licenses according to your migration plan.
- Confirm that Exchange Online is ready to provision mailboxes.
Proper destination configuration helps prevent mailbox provisioning and user access issues during migration.
Step 2: Open the Exchange Admin Center
Once Microsoft 365 is ready, access the Exchange Admin Center to configure the migration.
- Sign in using your administrator account.
- Open the Exchange Admin Center.
- Navigate to the Migration section.
- Open the migration batches interface.
- Select the option to create a new migration batch.
The available migration options may vary depending on the Exchange environment and configuration.
Step 3: Select the Migration Type
Choose the migration method that matches your source Exchange infrastructure.
- Cutover migration: Moves supported Exchange mailboxes to Microsoft 365 in a single migration event. Generally suitable for smaller organizations planning to migrate all mailboxes together.
- Staged migration: Moves mailboxes in batches over time and is intended for certain legacy Exchange environments.
- Remote move migration: Moves mailboxes between on-premises Exchange and Exchange Online in supported hybrid environments.
- IMAP migration: Transfers email messages from compatible IMAP systems but does not migrate all Exchange mailbox data.
Select the appropriate method based on your Exchange version, mailbox volume, coexistence requirements, and migration timeline.
Step 4: Configure the Migration Endpoint
A migration endpoint allows Microsoft 365 to connect to the source email environment and transfer mailbox data.
Depending on the migration method, you may need to provide server details, authentication information, and connection settings.
- Select an existing migration endpoint or create a new one.
- Enter the required server and connection details.
- Provide authentication information, if requested.
- Run the connection validation.
- Resolve any connectivity or authentication errors before proceeding.
A properly configured endpoint is essential. Connection failures may prevent migration batches from starting or completing successfully.
Step 5: Select Mailboxes
After configuring the endpoint, select the mailboxes you want to migrate.
Depending on the migration method, you may be able to select mailboxes individually or upload a CSV file containing mailbox details.
For large organizations, a CSV file helps organize mailbox information and migration batches. Check that all email addresses and required fields are correct before proceeding.
For your first migration, select a small group of mailboxes to test the process.
Step 6: Start and Monitor the Migration Batch
Once the mailboxes and migration settings are configured, create the migration batch and start the migration.
During the process:
- Monitor the batch status in the Exchange Admin Center.
- Review the number of mailboxes successfully migrated.
- Check for warnings, synchronization errors, or failed mailboxes.
- Investigate mailboxes that remain pending.
- Allow synchronization to finish before completing the batch.
Depending on the migration type, you may be able to start, stop, edit, or complete migration batches through the graphical interface.
Step 7: Verify Mailbox Data and Complete Migration
After migration, verify that the destination mailboxes contain the expected data.
Check the following:
- Emails in Inbox, Sent Items, and custom folders.
- Attachments and older email messages.
- Calendar appointments and meetings.
- Contacts and other supported mailbox items.
- Outlook connectivity and user sign-in.
- Sending and receiving emails.
Once everything is validated, complete the migration batch according to the selected migration method. Update mail routing or DNS records, such as MX records, when required by your migration plan.
Do not decommission the source Exchange Server until mailbox data, email delivery, and user access have been verified.
When Native Migration Methods Are Not Enough
The Exchange Admin Center is useful for supported migration scenarios, but it may not meet every organization's requirements. Administrators can encounter challenges when migrating large mailboxes, archive mailboxes, public folders, multiple domains, or complex environments.
In such situations, a dedicated Exchange migration tool can simplify the process.
Stellar Migrator for Exchange is designed to migrate Exchange mailboxes to Microsoft 365 through a graphical interface, reducing the need for complex PowerShell commands. It supports migration of primary mailboxes, archive mailboxes, shared mailboxes, and public folders.
It also provides features such as automatic mailbox mapping, batch migration, incremental migration, selective migration, and rerunning failed or incomplete migrations. These capabilities can help administrators manage mailbox transfers from a centralized interface.
Common Challenges During Exchange Migration
Even when using graphical migration tools, administrators may encounter the following problems:
Mailbox migration failures: Incorrect credentials, insufficient permissions, connection problems, or unsupported configurations may cause migration failures. Review error reports and resolve issues before retrying.
Large mailbox migration: Mailboxes containing years of messages, attachments, and archives can take longer to transfer. Bandwidth, mailbox size, server performance, and service throttling affect migration speed.
Missing mailbox items: Some emails, folders, calendars, or contacts may appear missing after migration. Compare the source and destination mailboxes before finalizing the migration.
Email delivery problems: Incorrect mail routing or premature DNS changes can interrupt email delivery. Plan routing changes carefully and verify Microsoft 365 configuration.
Outlook connectivity issues: Users may experience sign-in prompts, profile problems, or connectivity issues after migration. Provide clear instructions for accessing their new mailboxes.
Conclusion
Migrating Exchange mailboxes to Microsoft 365 without PowerShell is possible through supported graphical migration methods. The Exchange Admin Center allows administrators to configure migration endpoints, select mailboxes, create batches, and monitor progress without manually executing scripts.
However, successful Exchange Migration requires proper planning, connectivity checks, data validation, and careful email routing. For straightforward environments, native migration options may be sufficient. For complex mailbox transfers, a dedicated tool such as Stellar Migrator for Exchange can simplify the workflow through batch migration, automatic mailbox mapping, and incremental transfer capabilities.
Choosing the right migration method based on your Exchange environment and business requirements helps ensure a smooth, secure, and reliable transition to Microsoft 365.
Frequently Asked Questions5 FAQs
Quick answers to common questions about this topic
Yes. You can use the Exchange Admin Center to configure and manage supported mailbox migrations through a graphical interface. The available migration types depend on your Exchange version and environment.
Yes, supported mailbox migration methods can transfer emails, calendars, contacts, and other mailbox data. However, the items migrated depend on the migration method. IMAP migration, for example, primarily transfers email messages.
Yes. Batch migration allows you to move selected mailboxes in groups. It is useful for migrating departments gradually, testing the process, and reducing disruption to employees.
Migration duration depends on mailbox sizes, the number of users, network bandwidth, server performance, throttling, and the migration method. Smaller migrations may finish in hours, while larger environments may require several days.
For supported environments, the Exchange Admin Center is a convenient native option. For larger or more complex migrations involving archives, public folders, cross-domain environments, or advanced mapping, dedicated migration software may provide a simpler workflow.